Wednesday, October 26, 2011

Halloween Nail Ideas

Need some ideas to get awesome Halloween nails in a hurry? After reading up on the subject myself, and trying a few things out, I've come up with some time saving tips to get great Halloween nails!


On the pinky I've got a cute Candy Corn design! Easy to do with just three colours.
Start with the Orange as a base
Do a dab of yellow near the cuticle to make a shape like your natural moon
Finish with a stripe of white
Done! Looks great, but if you don't have matte orange, yellow, and white, you're out of luck.


On the thumb I've got black and orange as a base and Sally Hansen's Crackle nail polish in Fractured Foil. Looks great, but what if you don't have the crackle polish?

You can easily do any of the three designs on my index, middle, and ring finger provided you have any light colour to use as a base, and ... a Sharpie!
First, paint your nails in your chosen base colour. Apply clear coat, and wait til dry. Thoroughly.
Using a good quality permanent marker like a Sharpie, draw your design being very gentle and only barely touching the surface of the nail with the marker. If the marker seems to skip along the surface, or is streaky, you are pressing too hard.
Tip: Ask a friend to do your dominant hand for you.

You can see how to do the skull and spider web at Lipgloss and Black's blog. They are a Toronto based indie fashion house with awesomely dark but modern clothes. Check out their blog to see an alternate way of doing the spider web.


Drawing the spider web is easy, just make kindergarten waves!


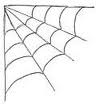
Fig.1: Terrible drawing using laptop's touch pad

Start with the curved lines, making what looks like the way a kindergartener would draw waves in the water if asked to. Join each wave line together with a straight line going through the points of each.

As for the ghost design... Well, I'm sure anyone can draw a better ghost! Mine's terrible! >.<
You can even write something (Boo!) draw a bat, or anything else you can imagine...


Once you're done drawing your design, be sure to wait several hours before applying topcoat. When you do, use as few strokes of the brush as possible, as it's easy to get streaks of black on the white. If this happens no worries, you can just touch it up with your white nail polish on a toothpick. Clean up any nail polish from your cuticles with a cotton swab and some remover, and you're good to go to the Halloween party!


What do you think? My favourite is the Candy Corn nails, but I hate the candies!


Monday, October 24, 2011

How to Put in Contacts

I personally have always found eyeballs and the mere thought of touching my own to be quite disgusting. Our eyes are delicate, and quite magical in the way they work. Because of this, and stories I'd heard about contact lenses becoming lost in the eye, I'd never wanted to try them. Once I heard of circle lenses though, I really wanted to try them out because of the awesome eye enlarging effect. The tips I've posted here are what got me to finally try circle lenses, and now I love them!

To get over the fear of touching your own eye, and putting something in it, you need two things; knowledge, and practise.

Did you know there is less feeling in the sclera (whites) of your eye than the iris? You can actually touch the sclera and not feel any pain at all! To try it out you just need some contact lens solution; first go to the bathroom and wash your hands and dry them thoroughly. Pour a little contact lens solution on your finger, then look to one side in the mirror. With your clean wet finger, gently touch the corner of your eye. You should feel the pressure of your finger, but no pain. This is because you are not disturbing your eye at all, just gently touching with a wet finger. This is what you will feel when putting in your contact lenses.


Here's the best video to show you how to put in and take out your lenses. It's made by Acuvue, and is what helped my get over my Ommetaphobia (fear of eyeballs)


How to Insert Contact Lenses

  • STEP 1: Thoroughly wash and dry your hands with soap and a clean towel.
  • STEP 2: Rinse your lens with solution to remove any trace of debris.
    Tip: Do not use your lenses straight out of the vial. They must soak in solution for at least 4 hours prior to first use.
  • STEP 3: Place the lens on the tip of your index finger. Be sure the lens is correctly oriented by checking the sides are straight, and not flared out.
  • STEP 4: Use your other hand to hold your upper eyelid so you won’t blink.
    Tip: Be sure this hand is dry to avoid your eye still pulling shut
  • STEP 5: Pull down your lower eyelid with the other fingers of your applying hand.
  • STEP 6: Look to the side and gently place the lens on the white part of your eye.
  • STEP 7: Slowly move your eye to look at the lens to centre it.
  • STEP 8: Release your eyelid and close your eye for a moment, or blink a few times.
  • STEP 9: If your lens feels uncomfortable, remove it and inspect for damage or debris. If it’s damaged, discard it. Otherwise, rinse with more solution and reapply.

How to Remove Contact Lenses
  • STEP 1: Thoroughly wash and dry your hands with soap and a clean towel.
  • STEP 2: Move your head to the side while looking straight in to the mirror.
    Tip: To avoid mixing up your lenses, always apply (and remove) them in the same order.
  • STEP 3: Bring your index finger close to your eye until you touch the edge of the lens.
  • STEP 4: Gently hold it in place as you move your head back to centre. This drags the lens off of your iris without having to touch it.
  • STEP 5: Gently squeeze the lens between your thumb and index finger and remove it.
  • STEP 6: Remove the other lens following the same procedure. Always be sure to rinse your lenses before putting them away.
 

So, now that you know how easy it is to put your contacts in and take them out, you can order your circle lenses! Just visit the Shop page and there you'll find all our latest styles of circle lenses in stock and ready to ship to you! One more tip, when choosing your first pair of circle lenses, try to go for a smaller (less than 14.5mm) size, and a colour close to your own. This will help you get used to putting them in, and their bright big eyed look!


Wednesday, October 19, 2011

Spotting Fake Geo Circle Lenses

There are so many sites, blogs, Facebook pages, and people on Craigslist, and other classifieds sites selling lenses, it's hard to imagine where all these lenses are coming from, and if they're the real deal or not. Some brands like Besvue, Dueba, G&G, and others don't offer any sort of counterfeit detection system, but Geo Medical, the leader in circle lenses does.


Fake lenses can seriously damage your eyes. If you can stomach seeing a really gross infected eyeball, visit the Geo Police. This is a blog dedicated to calling out sellers of counterfeit lenses, and showing consumers what the authentic Geo Medical counterfeit detection sticker should look like.


Why is it so important to use only authentic lenses?
Consider this, have you ever bought a knock off handbag, maybe a Cuess, or Vuis Luitton? These bags look similar to the real thing but are made of cheaper materials, using cheaper manufacturing methods. These bags often end up with malfunctioning zippers, handles that break off, and liners that are easily torn. The same can be said about counterfeit lenses, but with much more devastating consequences than having to carry your purse home with no strap.

Fake lenses are often made using clear, daily disposable or three month disposable lenses, which are cheaper than yearly disposables. Using daily disposable contact lenses for a year could have serious effects on your eyes, especially dehydrating the eyes. The method that the colour is applied to the lens is different as well.

Authentic Geo Medical circle lenses are coloured using the Dyeing Process, which allows the most oxygen to reach the eye, resulting in a more comfortable experience for the wearer. This is the safest type of lens, and the kind you can only get for sure from Geo Medical. Don't trust your eyes to just any cheap circle lenses. Be sure to only use quality, authentic, circle lenses from a source you trust!

Links to Geo Medical's fake lens alerts:
17mm Fake Geo Lenses
Fake Anti-Fake Seal and Website 
Fake Packaging


Tuesday, October 18, 2011

New Lenses in Stock

We've just added some new lenses to our already great selection!

Princess Mimi Chocolate Brown is back in stock after being sold out, and comes in prescription strengths. The Princess Mimi series, designed by Tsubasa Masuwaka really gives a bold effect, which shows up great and still looks natural in photos. They are 15mm in diameter, and will really make your eyes look big and bright!


 In prescription strengths from -.50 to -8.00 in -.25 increments (eg; -1.00, -1.25, -1.50 etc..) We should have the correct strength for you in stock for only $30.67 Buy Your Circle Lenses Here!

If you prefer a lens that looks more natural close up, then you may like our newest addition, Besvue's Daisy series in Green, Brown, and Grey. These lenses are 14.5mm which will make your eyes appear bigger, and will have a more natural looking effect than the Princess Mimi series would. Besvue's Daisy series is only $28.06, and comes in prescription strengths from -1.00 to -6.00 in -.50 increments (eg; -1.50, -2.00, -2.50 etc..) so everyone can have big beautiful eyes!


  No matter which lenses you choose, you get a free lens case with your order, as well as shipping for only $5 with tracking!


Thursday, October 13, 2011

Facebook's New Translate Option

Have you noticed something different about Facebook posts from your favourite pages?
Facebook has quietly slid the Translate feature in to posts written in a language other than English. Now, you may see the option to translate the post, or comments if in another language, right next to the like and comment button.


This is great if you know English, but I guess everyone else is out of luck for now until Facebook fully integrates the feature with their current platform, and works out the bugs.


The translations are provided by Microsoft Bing, but are moderated by users. This means that bilingual users can enter a translation in that pop-out window. The human translations can be managed by page administrators using a “manage translations” link underneath posts on pages they manage. Try it out Here.

Wednesday, October 12, 2011

My, What Prominent Limbal Rings You Have!

If you've been shopping around for circle lenses, you may have noticed that some have a prominent black line around them while others don't. This is the limbal ring. If you go and run for the mirror right now, you may or may not see your own. This ring is thought to be an indicator of youthfulness as they appear thickest near your early twenties, and fade from there.

Researchers at the University of California at Irvine have even gone so far as to do a study where they showed volunteers eighty pairs of male and female faces. The faces were completely identical except for the darkness and size of the limbal ring. When asked who they thought was more attractive, the faces with the larger limbal rings invariably won out.

We already know that a bright white sclera (whites of the eyes) is an indicator of good health, and we generally use this, as well as facial symmetry, colour and shape of teeth, hair health and many other minor cues to determine attractiveness. The darker limbal ring may only be providing the appearance of brighter eyes by providing contrast, but if we're willing to whiten our teeth, use wrinkle creams, and adjust the appearance of our features with make up, it's no wonder people are rushing to get circle lenses.

This doesn't only affect men's perception of women. According to the study, men are judged equally by women seeking youthfulness, symmetry and health, so stock up on your circle lenses, boys!


Source: Evolutionary Psychology – ISSN 1474-7049 – Volume 9(2). 2011

Tuesday, October 4, 2011

Halloween is Almost Here!

Do you have your circle lenses yet?
Whether you're planning on dressing up, or just dressing nice, circle lenses will add the finishing touch! Our brand name lenses will have you comfortable and stylish, rocking those big kawaii eyes all night long. We have so many styles to choose from that you're sure to find something to match your style.


You'll need to order soon though, as it can take up to three weeks for your lenses to arrive! You get free tracking with every circle lens order though, so you'll know where your package is at all times.

Circle Lens Tips:

Properly soak your new lenses before trying them on for the first time.
Lenses need to soak for at least four hours when you first get them. The solution they are stored in is not regular contact lens solution and could hurt your eyes!

Be sure to try out your lenses before hand!
You don't want to fail by having itchy/watery red eyes at the big Halloween party. Try wearing your lenses around the house for at least four hours a few days before the event.

Always have your contact lens kit with you.
When wearing any contact lenses, you should always have a kit containing lens solution, lens case, and eye drops.

Never wear your Circle Lenses for more than 6-8 hours at a time.
Circle lenses, and some regular coloured contacts should not be worn for more than 8 hours at once. The larger surface covering your iris blocks oxygen from reaching your eye which causes irritation and redness. To combat eye fatigue, be sure to have good quality eye drops with you that are specifically for contact lens wearers. Regular use will keep your eyes hydrated so they look and feel their best!

Now that you're ready, have a look at our Order Form or check out our Shop page to see what we have ready to ship!